
Checkout FAQ
Answer common questions about shipping, returns or payment right on the Shopify checkout page with the FAQ module's expandable questions.
Last updated
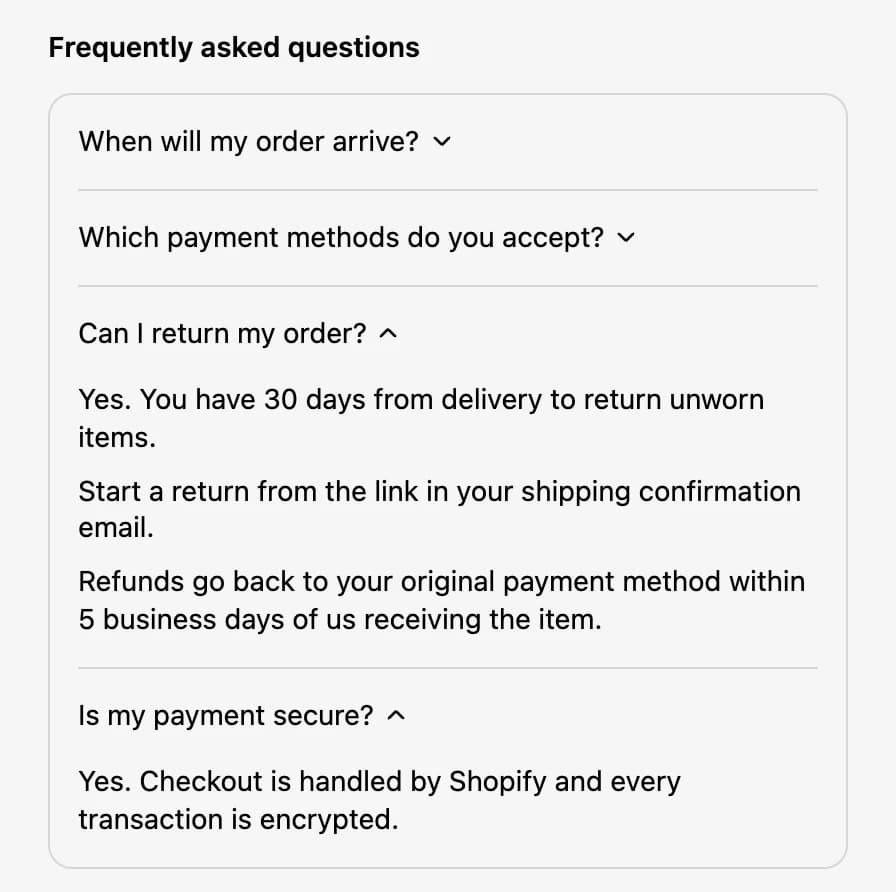
The FAQ module answers your shoppers' common questions right on Shopify's checkout page, such as when the order arrives, how returns work or which payment methods you accept. Each question expands to show its answer, so shoppers get clarity without leaving checkout.
Set up the FAQ block
Create the module
In EliteCart, go to Checkout and click Create module. Choose FAQ and click Create module.
Name and activate it
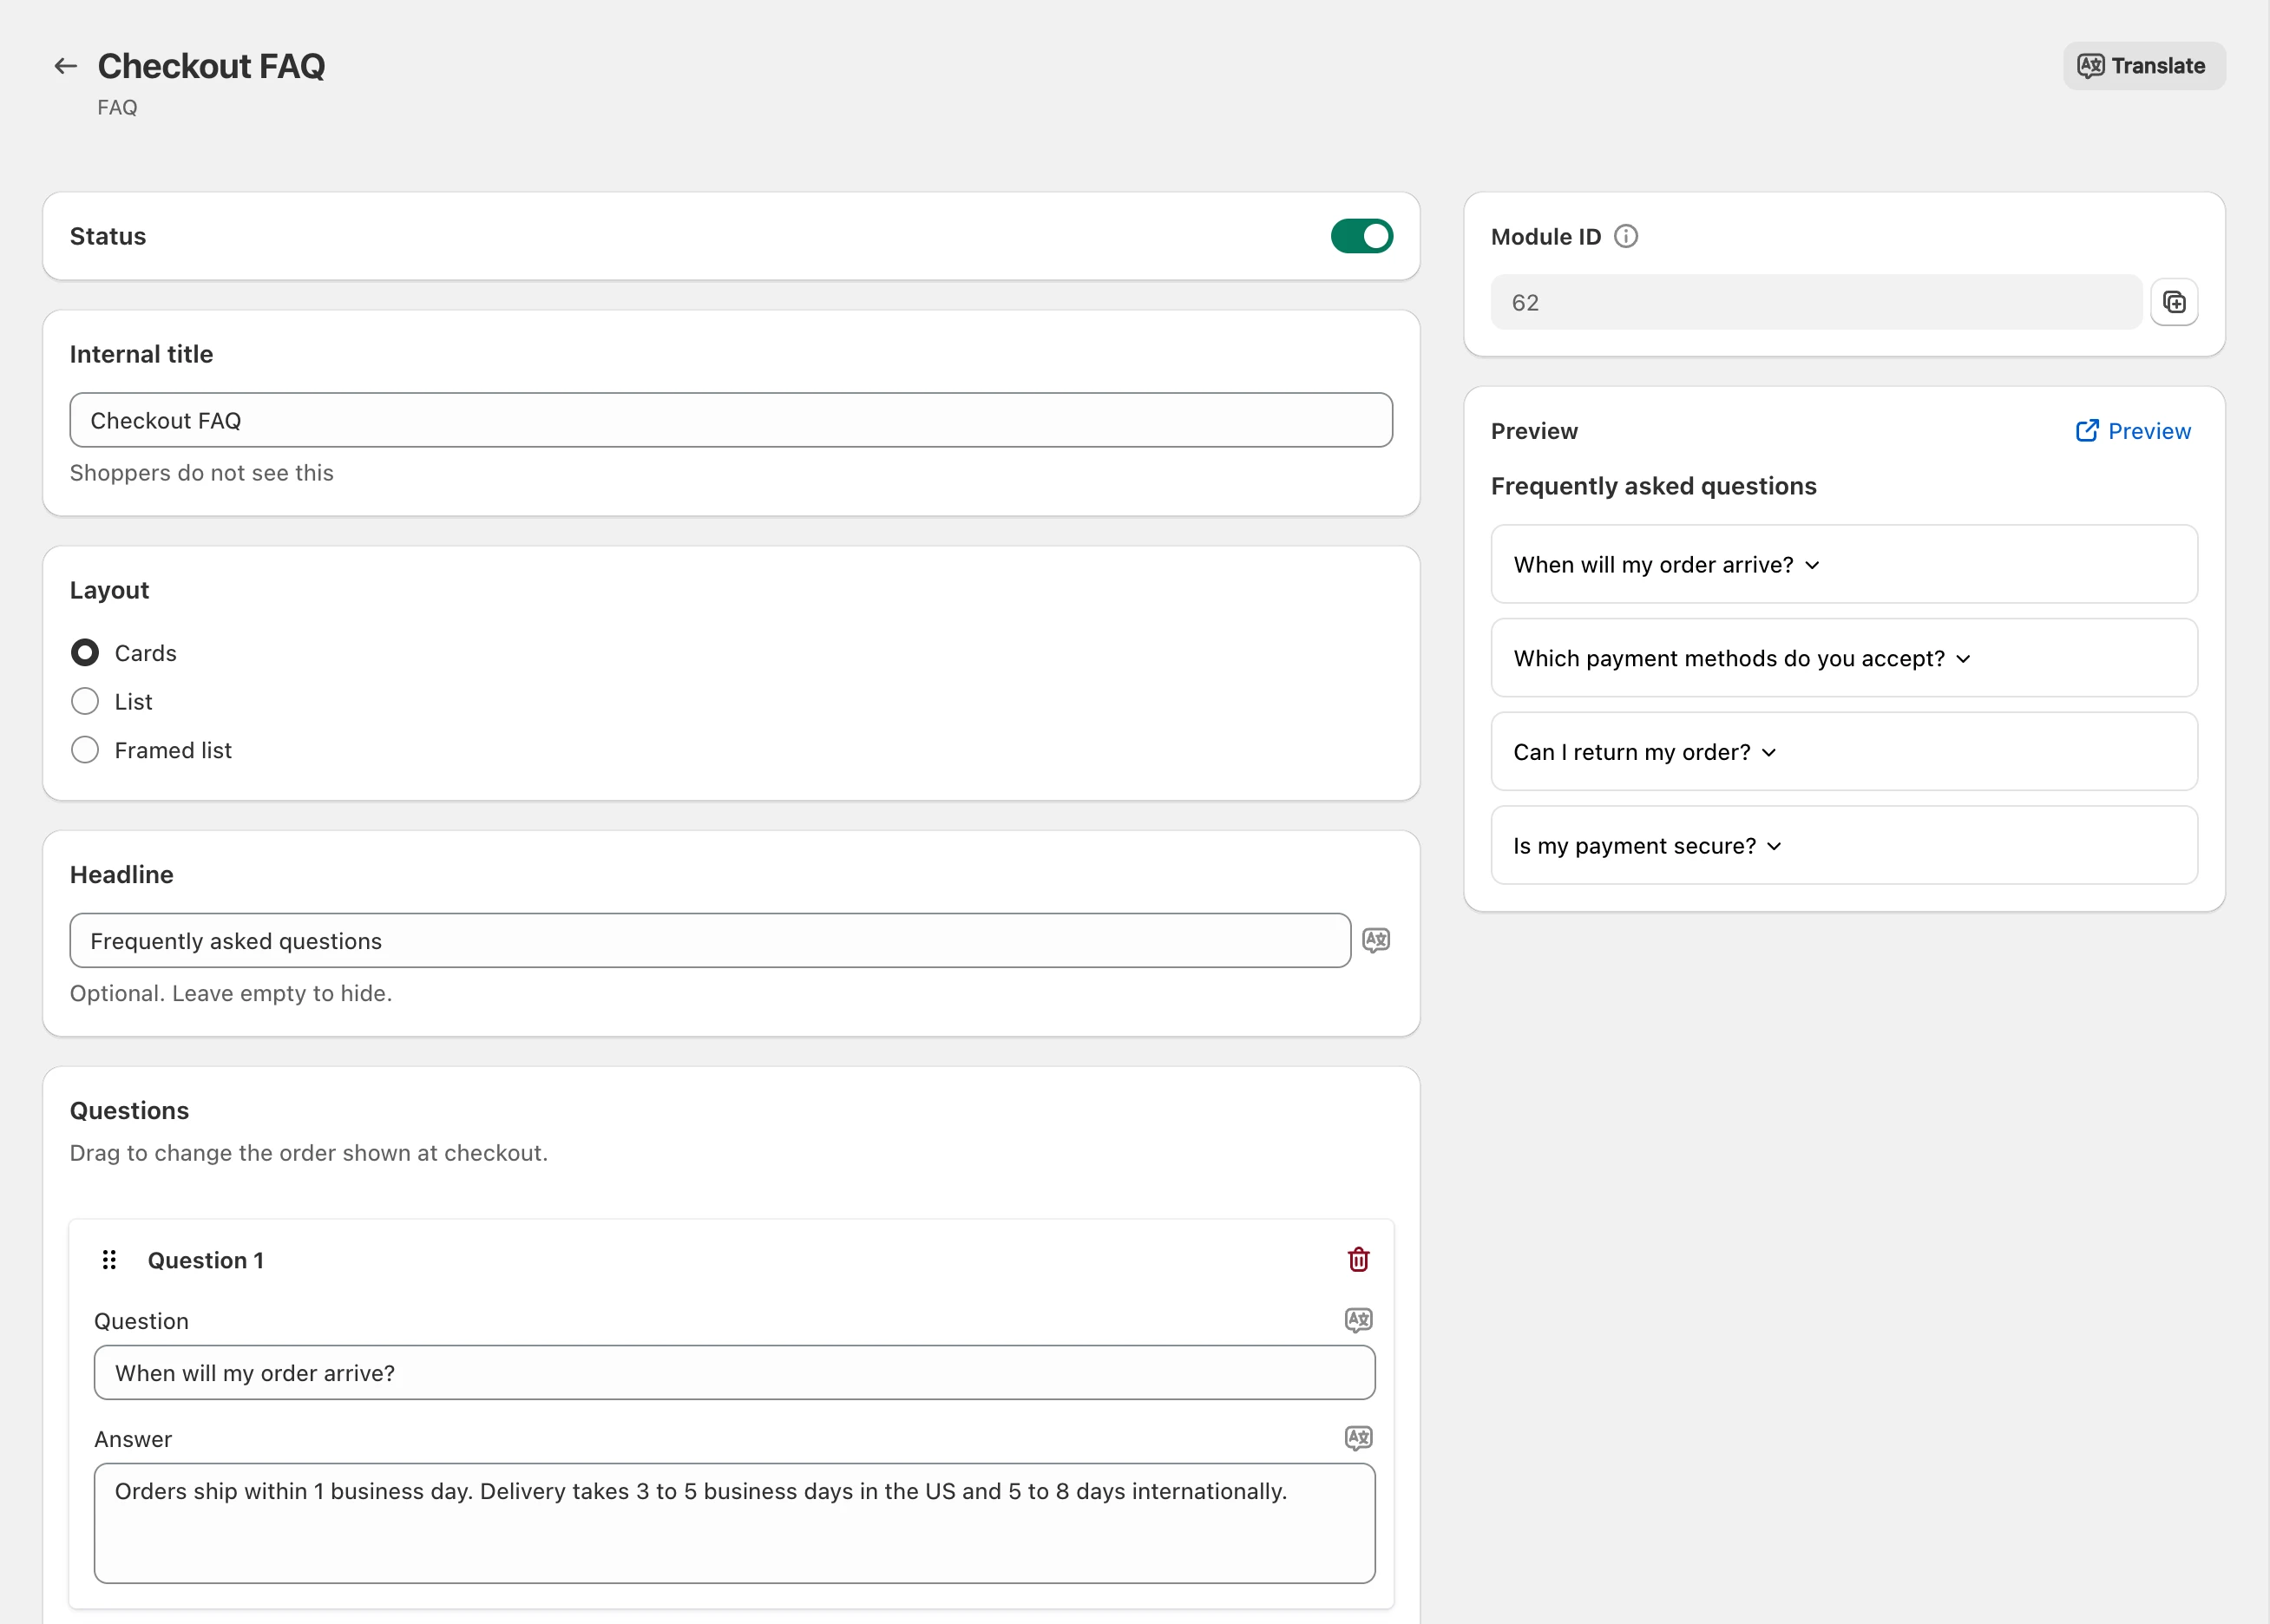
Switch on the Status toggle and give the module an Internal title (only shown in the admin), such as "Checkout FAQ".
Choose the layout and headline
Under Layout, pick how the questions are shown (see Layouts below). Under Headline, type the line shown above the questions, such as "Frequently asked questions", or leave it empty to hide it.
Add your questions
Click Add question, then type the Question and its Answer. Repeat for each question, then click Save. The preview on the right updates as you type.
Copy the Module ID
In the Module ID card, click Copy ID.
Place the block in checkout
Click Open checkout editor. Add the EliteCart FAQ Block where you want it, paste the ID into its Module ID setting and save the checkout editor.
Questions and answers
- Every question starts closed. Shoppers click a question to read its answer, and can open several at once.
- Answers are plain text. Each line break starts a new paragraph.
- Add up to 20 questions per module. To change the order shoppers see, drag a question by its handle. To remove one, click the trash icon next to it.
Keep answers short and specific to your store: delivery times, return window, payment methods and how to reach you work well right before payment. For a long policy, sum up the part shoppers need before they pay.
Layouts
- Cards: each question sits in its own bordered box.
- List: questions are stacked as plain rows with a thin line between them, for a lighter look.
- Framed list: one bordered box holds all questions, with a thin line between them and the headline above the box.
Translate your FAQ
The headline, every question and every answer are translated per language.
- If your store sells in more than one language, click Translate at the top of the module page to translate everything side by side. Pick the Language, click AI translate empty fields (or AI retranslate all), check the text, click Apply translations and save the module.
- To translate a single field, click the language icon next to it.
A question shows in a language only when both the question and its answer are translated into that language. Questions you haven't translated stay hidden for shoppers checking out in that language, so you can also answer region-specific questions per language, such as local delivery times.
Checks in the checkout editor
Shopify's checkout editor shows a notice on the block when it can't show anything yet. Shoppers never see these notices.
| Notice | What to do |
|---|---|
| "EliteCart: Module ID required" | Paste the Module ID into the block's settings. |
| "This ID belongs to a different module type." | Paste the ID of an FAQ module. Each module type has its own block. |
| "No active EliteCart module has this ID." | Check the ID, and switch on the module's Status in EliteCart. |
| "This module has no questions in this language yet." | Add questions or translations for the language the editor previews. |
Test it
Go to checkout
Add any product to the cart and go to checkout.
Open a question
Confirm the questions show where you placed the block, all closed, then click one and check its answer.
Check other languages
Switch the store language and confirm the translated questions show.
Still stuck?
Chat with us and we'll help you get your cart live. Or email contact@elitecart.app.